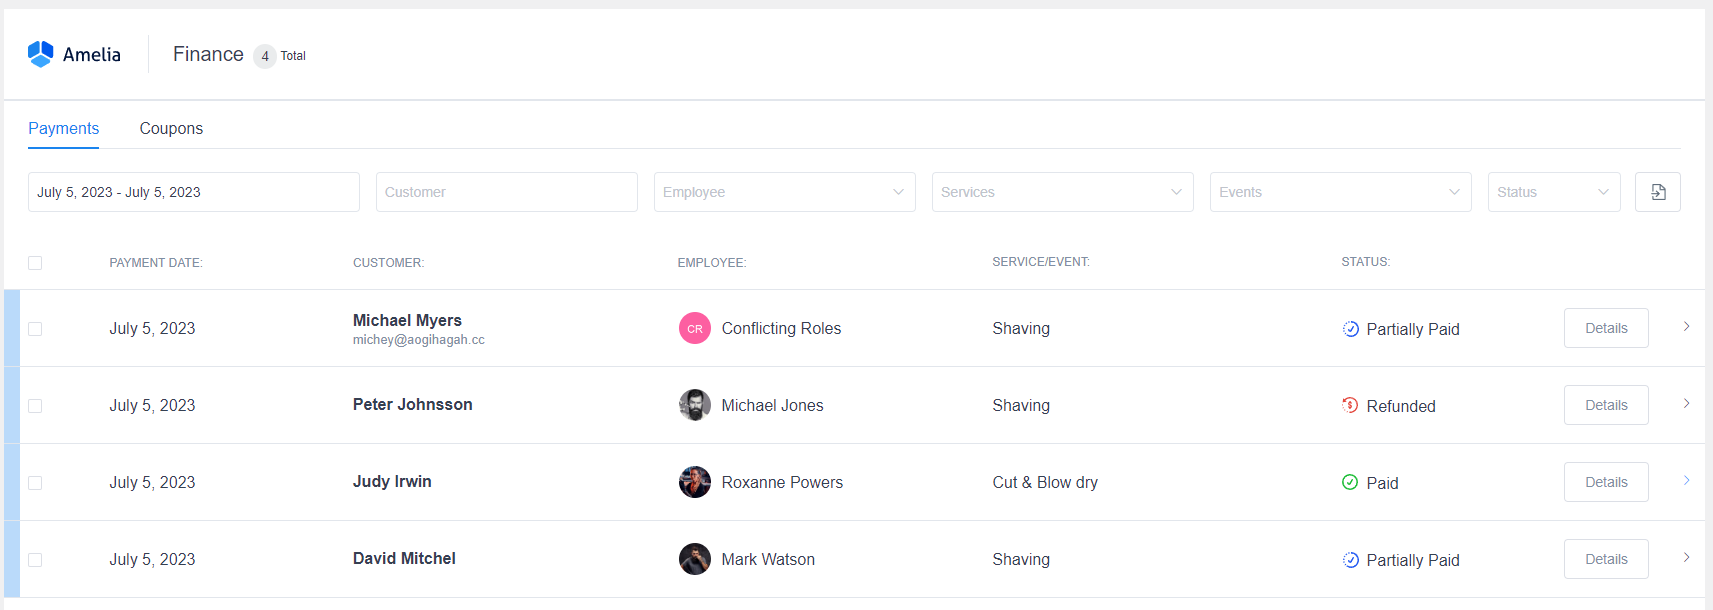
The Finances page shows you two different tabs when the “Coupons” option is enabled in the “Payments Settings”. “Payments” is the default tab.
Content
Payments
Coupons
Payments
The “Payments” page shows the information about individual payments. To specify the number of records that are to be displayed at one time, select the required number in the “Default items per page” in the “General Settings”.
Payments for appointments and events are stored on the same screen and you’ll be able to see what the payment is for in the “Service/Event” column. Since the events have the option for assigning multiple employees, in the “Employee” column you can see multiple employees assigned.

With the filters that appear at the top of the page, you can narrow the results by common characteristics such as date, customer, employee, service, status, or event. The date filter is predefined by the period of seven days starting from the current date but you can change to some other period and the plugin will remember this in all date filters.

The date filter shows the transactions based on the date when they were made. For example, if a customer booked an appointment on February 2nd, 2023, but their appointment is booked for August 3rd, 2023, you’ll need to select February 2023 in order to see this transaction.
Your payments can be exported to a CSV file for reporting. At the top right of the “Payments” page and next to the filters, just tap the “Export” button. Clicking on the “Export” button opens a dialog that allows you to choose the delimiter used for CSV and to select the columns you’d like to export. When you are ready, tap on the “Export” button in the dialog to download the CSV file.
The payments table provides information about the payments such as the payment date, customer/attendee, employee, service/event, and status. You can expand a payment (row) by clicking on it. An expanded record shows the information about the appointment or event date, payment method, and the amount paid for the booking.

Payments passed through online payment methods (PayPal, Stripe, Mollie, RazorPay, or WooCommerce) If you are based in South Africa, you will use WooCommerce with PayFast. automatically have a “Paid” or “Partially Paid“ status. For a payment using an “On-site” method, the payment status and paid amount have to be updated manually. Click the “Details” button to open the details dialog for the chosen payment. Here you can see the detailed information for the individual payment, change the payment data, refund, or delete the payment. By clicking on the “Pen” icon in the dialog footer, a small dialog will appear from where you can update the paid amount and the payment status.